
A telepresence robot is a computer-controlled robot which allows those who engage with it, to view and hear the robot’s operator (human, animated and/or IA) over the internet. While at the same time the robot’s operator can view and hear what or who the robot is interacting with.
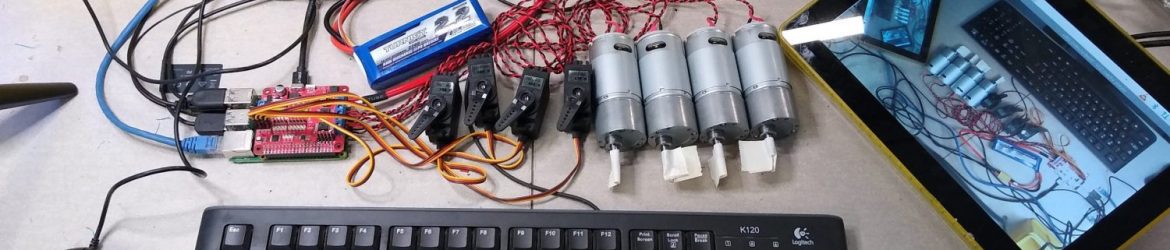
This telepresence robot is based around the low-cost Raspberry Pi computer and the Adafruit 16-channel 12bit pwm/servo controller. The robot also has a 4G LTE ethernet router to network the 2 onboard Raspberry Pi allowing them to network with each other and also be accessed over the internet. It also acts as a mobile wireless internet hotspot. The first Raspberry Pi controls 4 x geared DC motors with Robocaster wheels for motion and it’s 5 servos for the control of a 3D printed 3 axis arm, 2 servo grippers and arm webcam.
Software used to access the robot over the intenet and through private networks uses ZeroTier VPN via SSH and/or VNC. The main code controlling the motion, lighting and gripping arm was written in python and developed by Paul Schulz – Github Link here.
The second Raspberry Pi computer is for media and communications and has 2 x webcams for vision front and rear of the robot. 2 x low power LED HDMI 11″ monitors with built-in speakers for the robot’s face and the other for displaying information or promotions. Communications between to operators and people interacting with the robot can use any internet video chat system including Zoom, Google Meet, Facetime, etc. etc..
To add additional theatrical effect the robot drivers video can be animated using Adobe Character Animator and their voice changed using Clownfish Voice Changer.

The ERA Robot (Robot-e)
This robot was made possible from what we learned in 2019 when we built our first telepresence robot as a part of a very successful collaboration with Electronics Recycling Australia, Paul Schulz and Robert Hart.
ERA were running e-waste education incursions at local schools and they wanted a fun interactive robot made of e-waste which could be controlled over the internet. We all had so much fun with this robot we wanted to build another for the library.
Blogs
Blog 15/09/2020 – The has begun exploring the Library spaces and has become quite curious about all the customers that visit. It has spent lots of time watching, learning and playing with its new Library friends and getting a taste of what Library life is all about. However, we have run into a little problem. As the robot spends more and more time in the Library, it has realised a major difference between itself and its human friends. So a competition is begun to find Robot a name.
Blog 2/07/2020 – As a result of testing in the Library new omni-directional Robocaster wheels were added to reduce drag on the carpet when turning. Aslo the undercarriage reinforced with square alloy tubing.
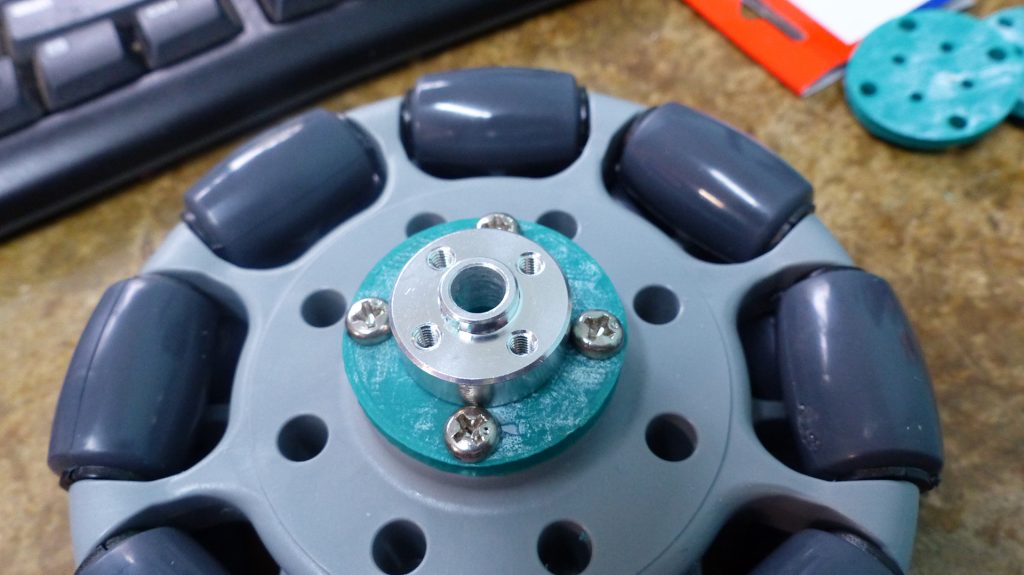
Blog 29/06/2020 – This was our first test at Enfield Library where we learned some things that were not apparent in the small space of my workshop. The major issue being the carpet has a very good grip on the wheels and so when turning it broke the undercarriage also amplified jerky movements.
Blog 23/06/2020 – testing the arm and claws attached to the robot and controlled over the internet using keyboard commands. Use ZeroTier VPN VNP, VNC and Python script written by Paul Schulz.
Blog 11/06/2020 – Getting it all to work together running on battery.
Blog 13/05/2020 – Making frame to hold wheels and motors
Blog 12/05/2020 – Redesign of the 3D printed brackets to include bearings and servo attachment points to improve movement and strength.


Blog 09/5/2020 Testing arm


5/05/2020 Blog
One of the things I wanted for this robot was some kind of gripping arm and do this I’ve designed and printing some servo tilt brackets.

19/04/2001 Blog basic setup.
